Getting started·Team access
Invite your team and set the right access
Add teammates to WATeamInbox, choose a workspace role, and start with access that matches the work they actually do.
A shared inbox works best when every person has their own account. You can see who owns a conversation, keep handoff notes attached to the customer, and remove one person’s access without changing a password that everyone shares.
Start with the people who will actually answer messages. You can add more people once the team agrees on how assignments, notes, and resolved conversations should work.
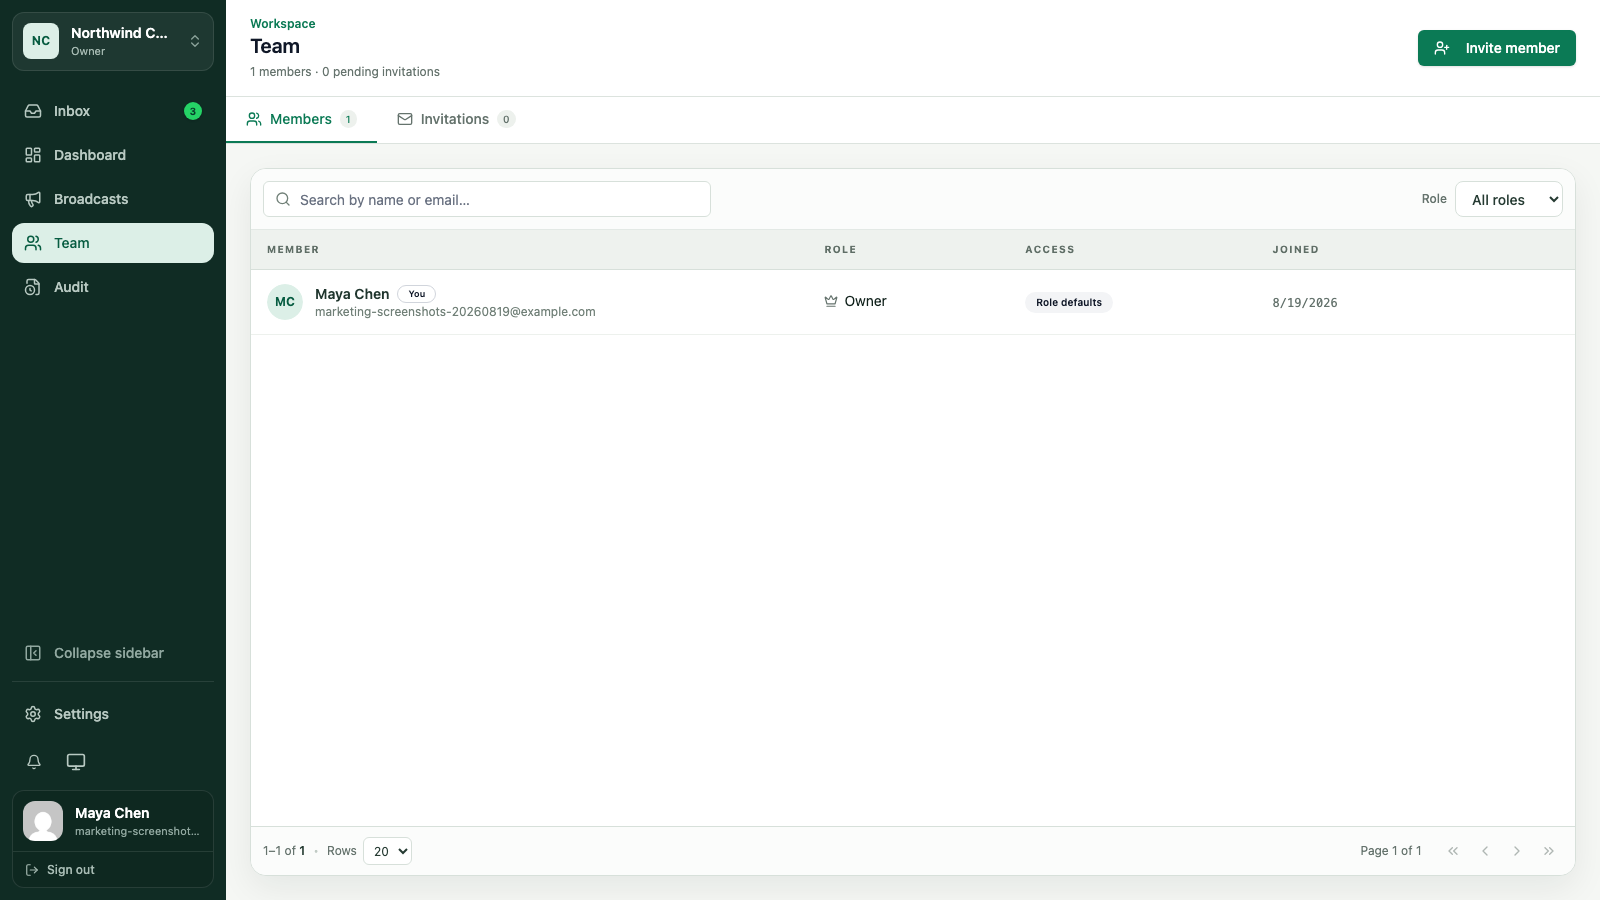
1. Open Team
From the workspace navigation, open Team and choose Invite member. You need the workspace permission to invite people. If you do not see the button, ask an owner or admin to send the invitation.
2. Add the work email
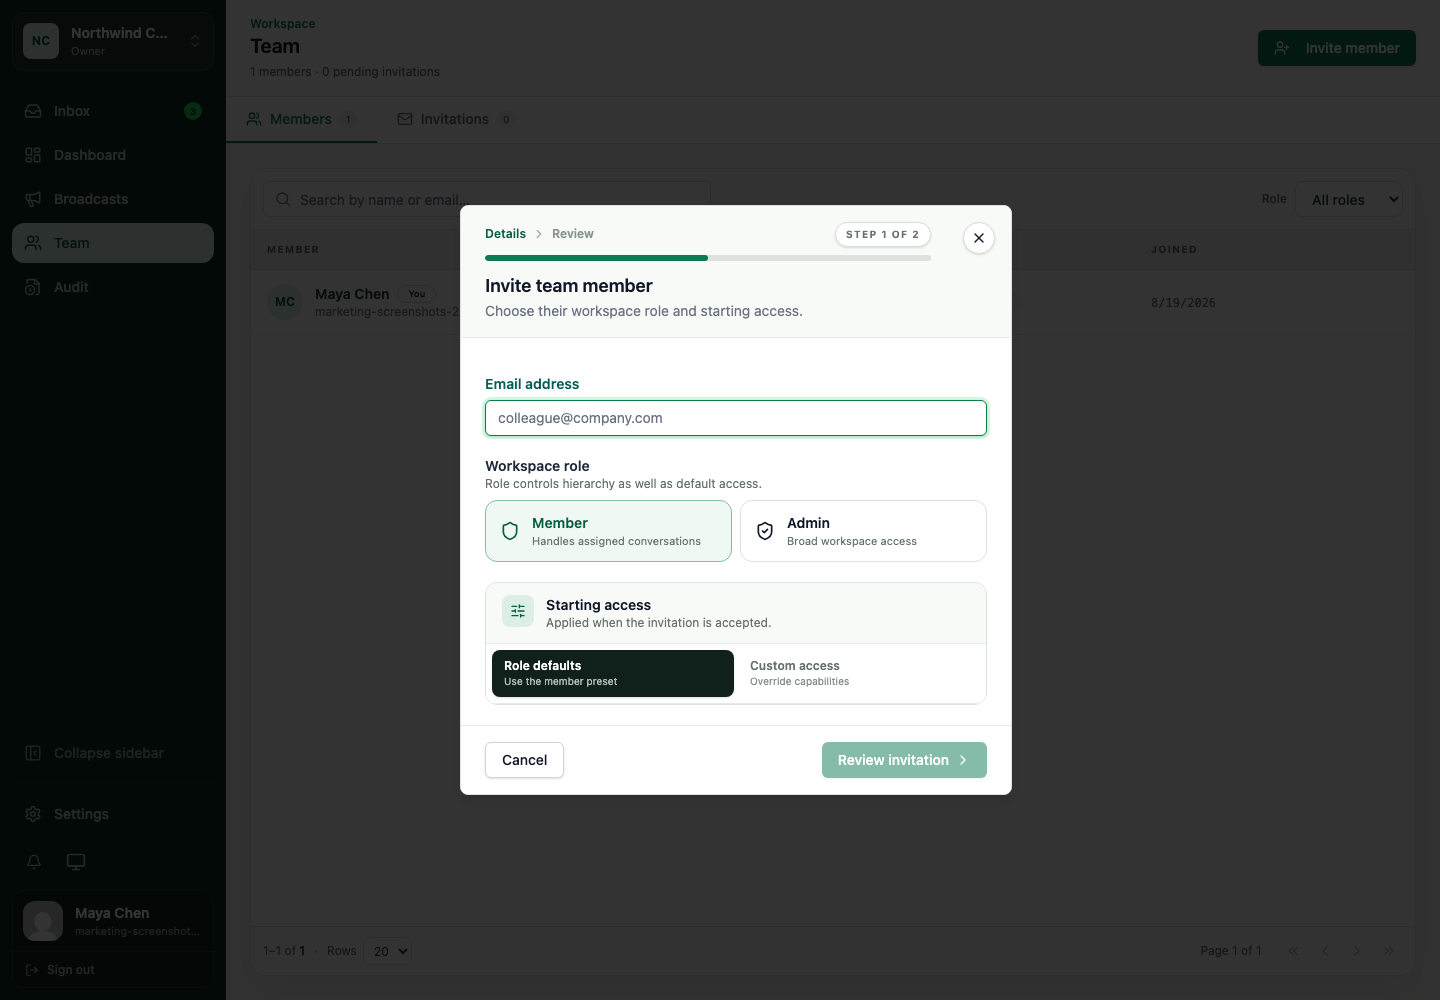
Enter the email address the teammate can open now. They will use the invitation email to accept the workspace invitation and create or connect their account.
Use a real work address rather than a shared inbox address. Individual sign-in makes the activity and ownership history useful later. If the invitee does not already have an account, their verification link carries the invitation; verifying the email accepts it and joins the matching workspace as a member.
3. Choose the workspace role
The role sets the starting shape of the person’s access:
- Member is a good starting point for someone who handles assigned conversations.
- Admin is for people who need broad workspace access, settings, or team management.
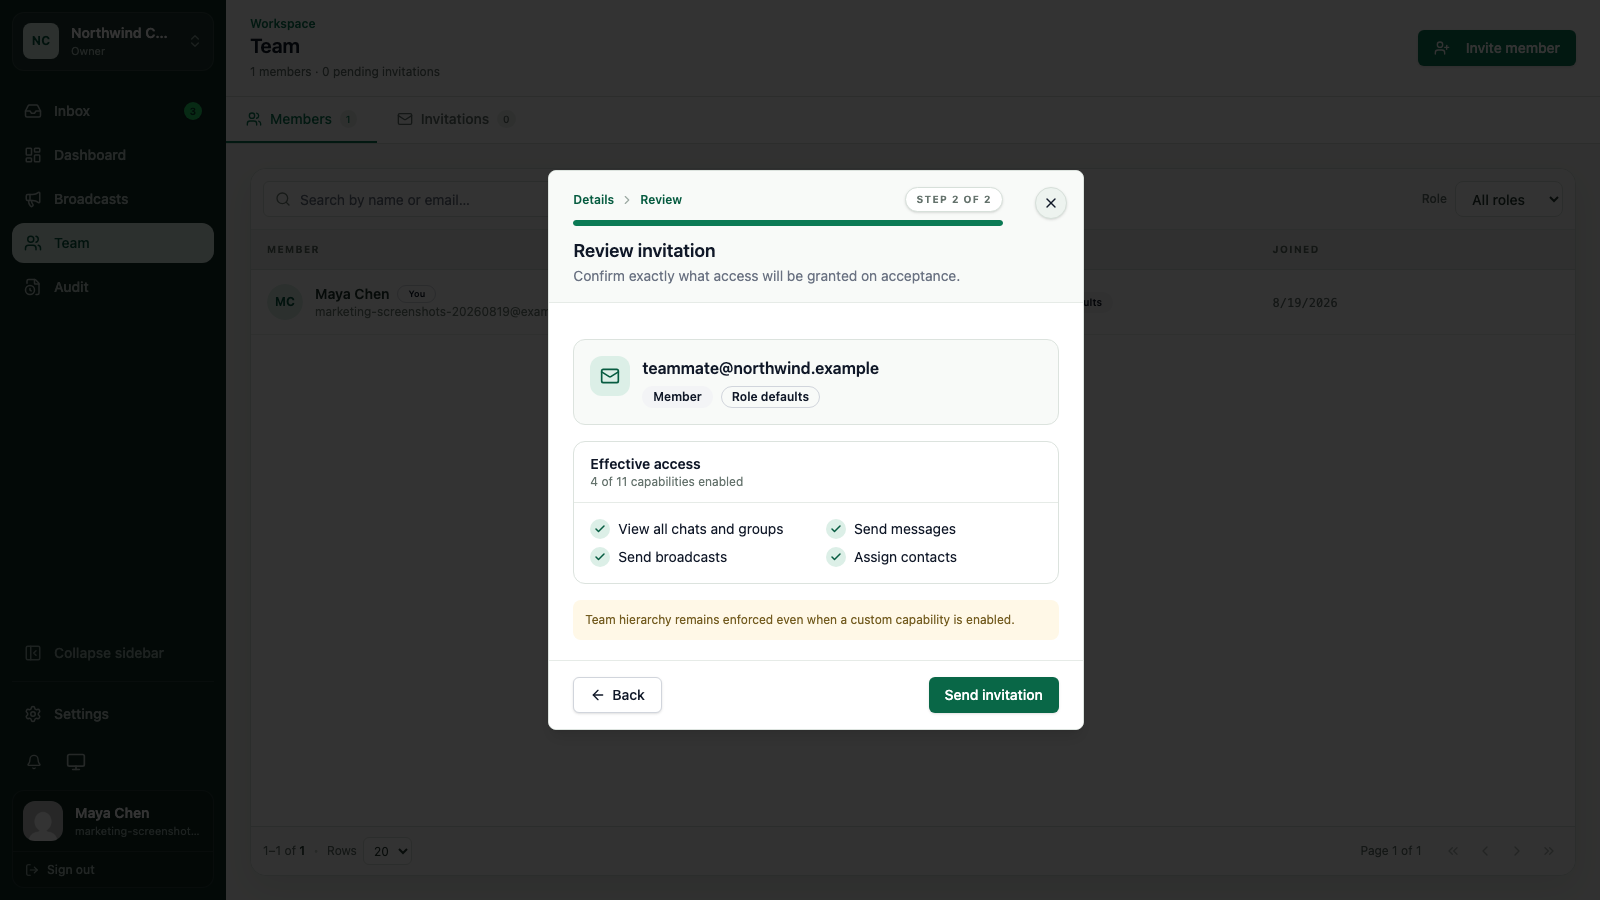
A role is only the starting point. The invitation review step lets you keep the defaults or adjust the capabilities that apply to this person.
4. Review starting access
Look at the access summary before you send the invite. Give a teammate the tools they need for their job, not every setting in the workspace by default.
For a support agent, that may mean reading and replying to conversations, using notes, and taking ownership. A manager may also need team management, exports, audit history, or connection settings.
Permissions can change as the person’s job changes. Review access when someone moves from frontline support to administration, and remove access promptly when they leave the team.
Start with two people
Invite one teammate and run a handoff together:
- One person opens a new conversation.
- They assign it and leave a shared note.
- The second person reads the thread and continues the reply.
- The first person checks that the ownership is clear.
This is a better onboarding exercise than inviting twenty people and hoping everyone discovers the workflow on their own.
Next, read how to assign conversations or how to work from the shared inbox.
Keep going
Try the workflow with one real conversation.
Create a small Cloud workspace and test the handoff with a teammate, or use the open-source application on infrastructure you control.